
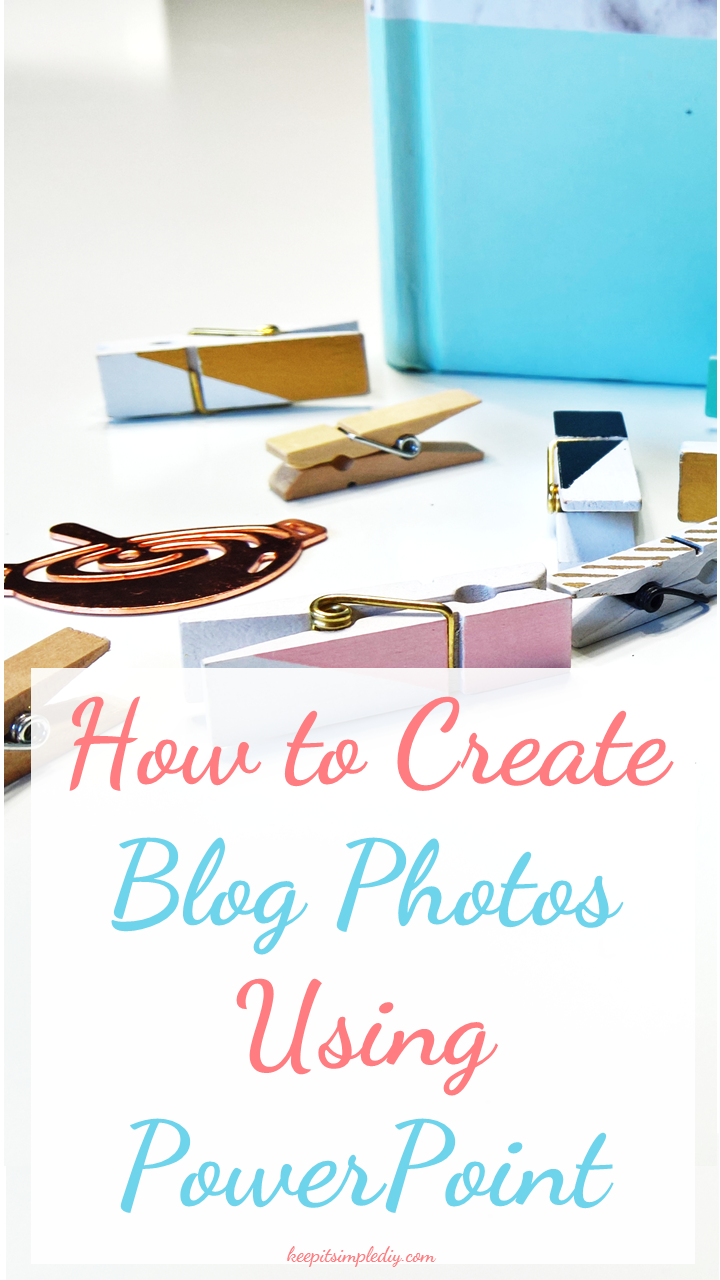
My How to Make Your Own Blog Photos post shows the steps that I use to create my images. Today I’m going to go into a bit more depth and show you how I do some of the editing. So, if you haven’t read the other post, go check it out and then come back to this one.
One thing to note before diving into the editing. I like to take landscape photos when I’m creating a collage of images. I will show you why below.
Setting Up PowerPoint
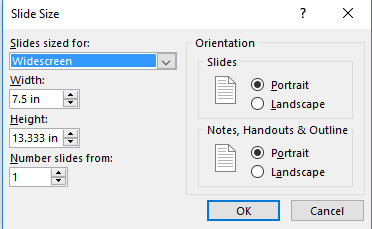
The first thing I do when I’m getting ready to create a blog photo is set up my template in PowerPoint. This is really simple. I just open a new document and change the slide orientation to portrait.
TAB: Design SECTION: Customize OPTION: Slide Size –> Change Orientation to Portrait
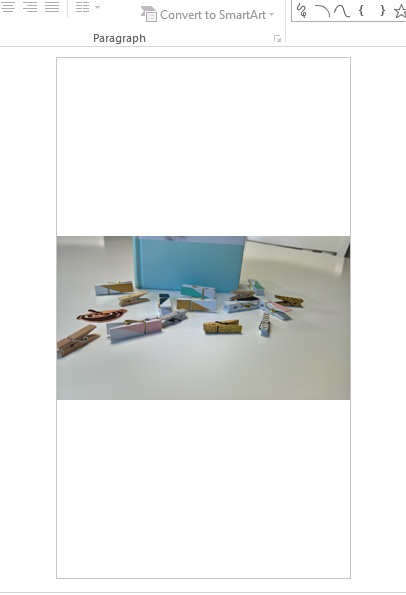
Once I have the size set, I delete the text boxes that are on the slide.
Inserting the image
I copy and paste one of the images from my collection into PowerPoint. At this point, the image only fills part of the slide. I resize the image by dragging the corners out until the top and bottom align. The right and left side will be way out of the canvas. This is what you want.
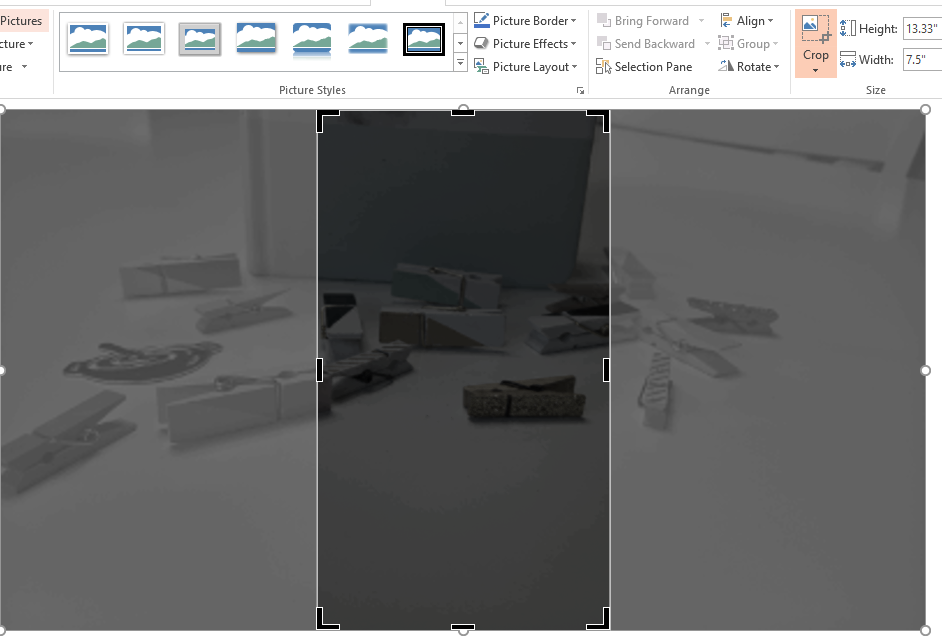
Setting the Image
Once you have the image large enough to cover the canvas, crop the left and right sides of the image. You will be able to see the slide edge when cropping and the photo should snap in place.
When the edges are set to the canvas, you can then drag the photo left and right until you have the perfect section. Click Crop again to complete the crop.
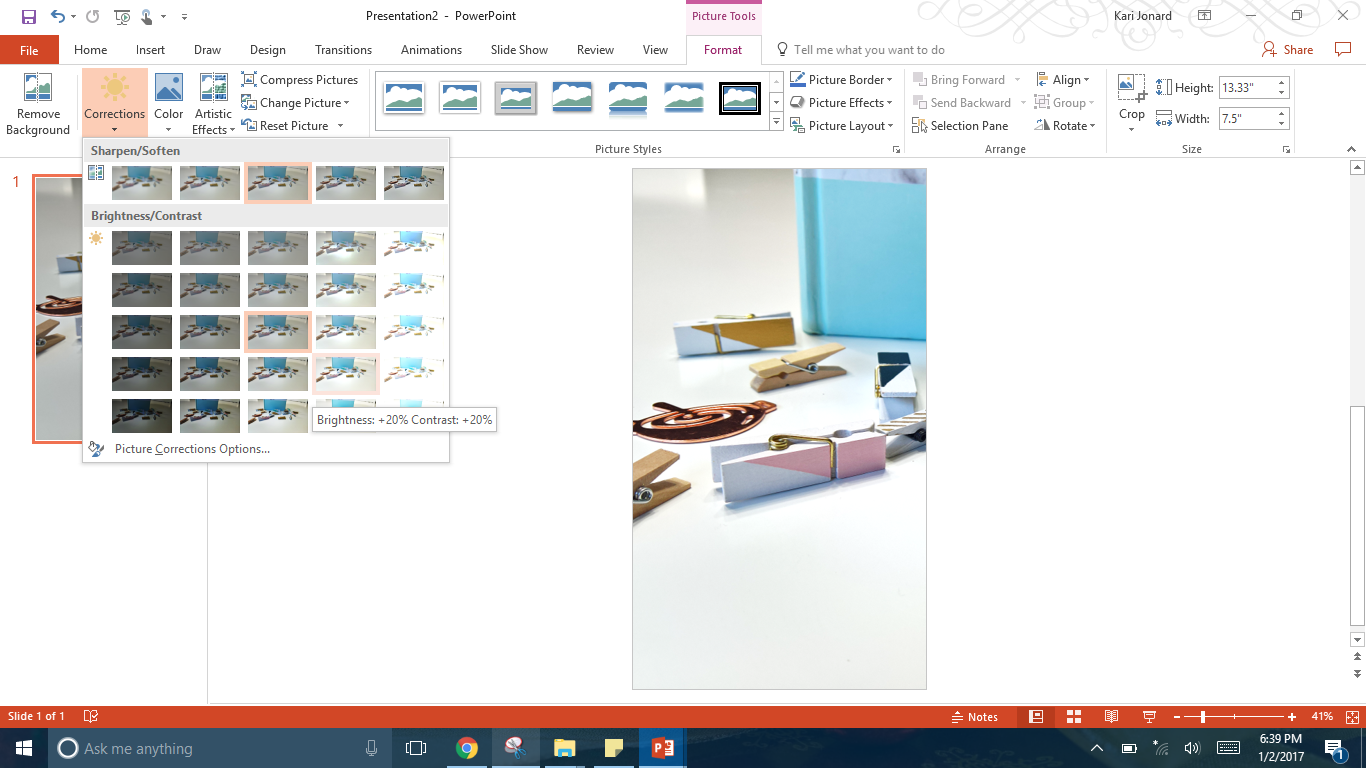
Basic image fixes
I only do a minimal amount of editing to each of my photos which usually only consists of a adjusting the brightness and contrast. Sometimes I will adjust the sharpness as well. On rare occasions, I will use a different editing program to create a blur or other effect.
Select the image by clicking on it. Then go to Format, Corrections and hover over the images to see a preview. Select the one you like the best. I typically like 20% Brightness / 20% Contrast but occasionally I choose a different option.
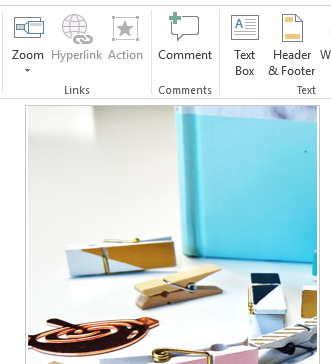
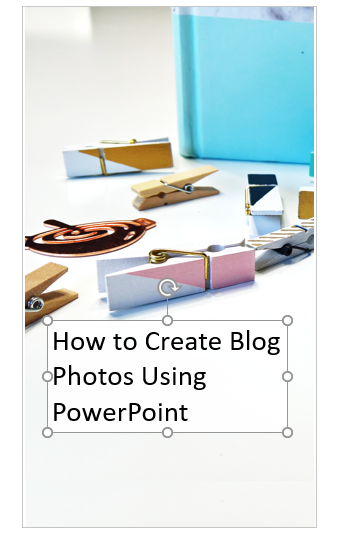
Inserting the text box
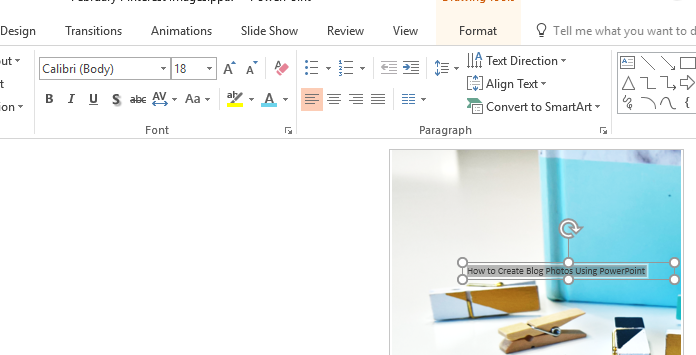
To insert the text box, go to the Insert Tab and click on Text Box. Drag the text box onto the photo. You can always adjust placement later. Write the text for your image in the text box.
Highlight the text and increase the font size until it is large enough that to fill the photo. We will adjust this again later. The initial increase is just to be able to read the words.
Designing the text box
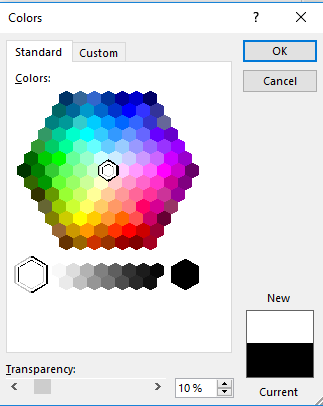
Click on the outside border of the text box. Click to the Format Tab and open More Fill Colors for Shape Fill.
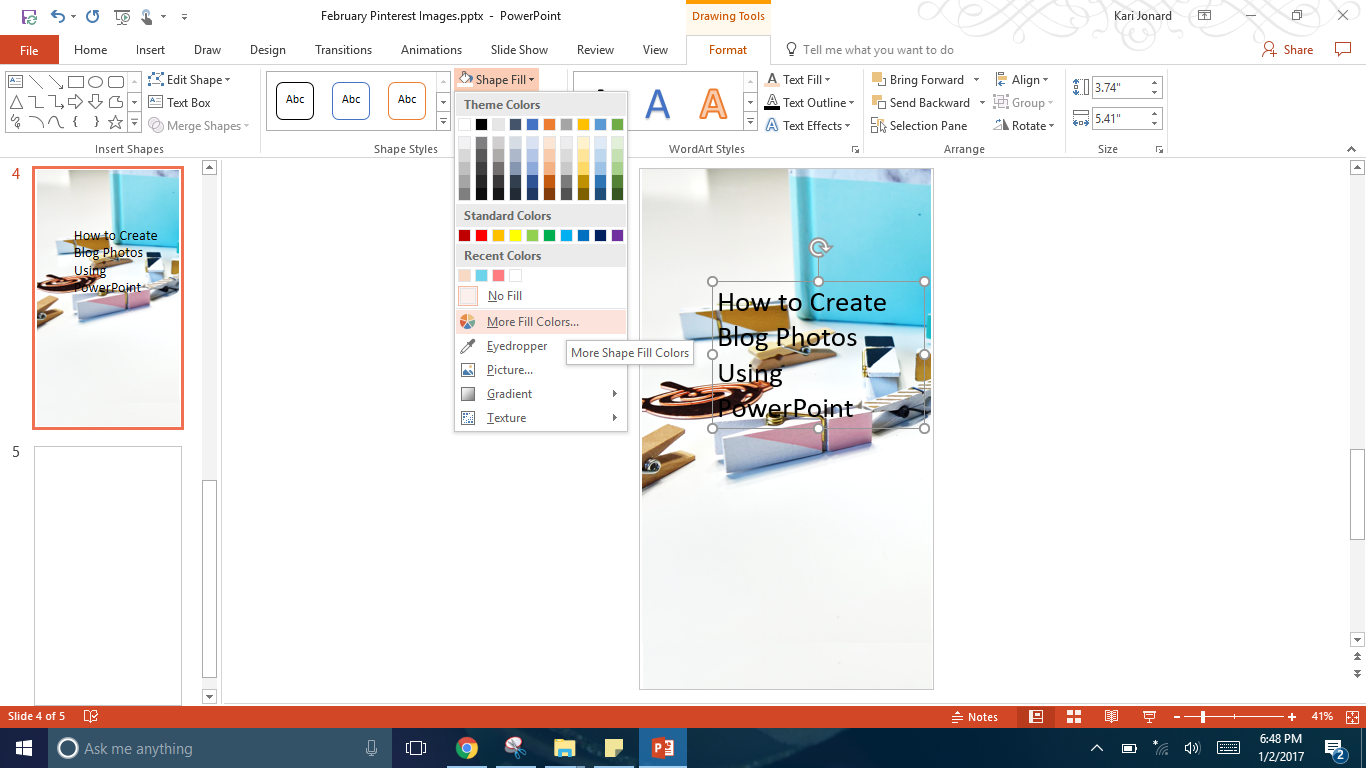
I usually fill white with a 10% transparency (opacity) but you can choose any option you want.
Editing the Text
At this point, I usually move the text box to around the area I want it to be. Change the colors and fonts any way you would like. I’ve even downloaded some additional fonts from Google. Don’t forget to add your watermark.
Finalizing your image
Once you have your fonts how you want them, you need to finalize the image. Your project is currently a PowerPoint file so you need to create the image file for your image.
To do this, go to Save As and then choose the PNG option. There are other image files such as a JPG but WordPress doesn’t play nice with JPG’s. So, if you may ever switch to WordPress, use PNG’s.

The End Product
Congratulations! You’ve now created a pin-worthy image by using PowerPoint!
If you have any questions, please reach out to me. I’m more than happy to help!


I prefer picmonkey.com, but great post. I didn’t even think that it is possible with PowerPoint.
I never would have thought to use power point for blog images. I always made slide shows and presentations but this is a great way to use it more!
I love using power point to make my blog images, I use it all the time!
xoxo, SS
Southern And Style
Looks complicated but I will give it a try. Thanks for breaking it down for us:-)
I had no idea you could use PowerPoint, thanks for sharing!
Cool! I never thought of using Powerpoint for this. I often use Canva. I will be giving this a try as well. You make it look easy.
Didn’t know powerpoint does this! How cool!’ I may try it one day.
xoxo,
http://befittingstyle.com/love-full-skirts/
I never though to use PP for making blog images! I’ll have to try it out.
Oh my! This is nostalgic for me..when i was younger, i used to do that to edit photos. Great post 😀