
This post contains affiliate links. As an Amazon Associate I earn from qualifying purchases. If you click a link and make a purchase, I may receive a small commission at no extra cost to you.

When I bought my house, one of the major downfalls was that the Master bathroom was extremely small! I quickly looked the other way though as I was delighted to have a walk in closet in two bedrooms and that the laundry is upstairs between all of the bedrooms.
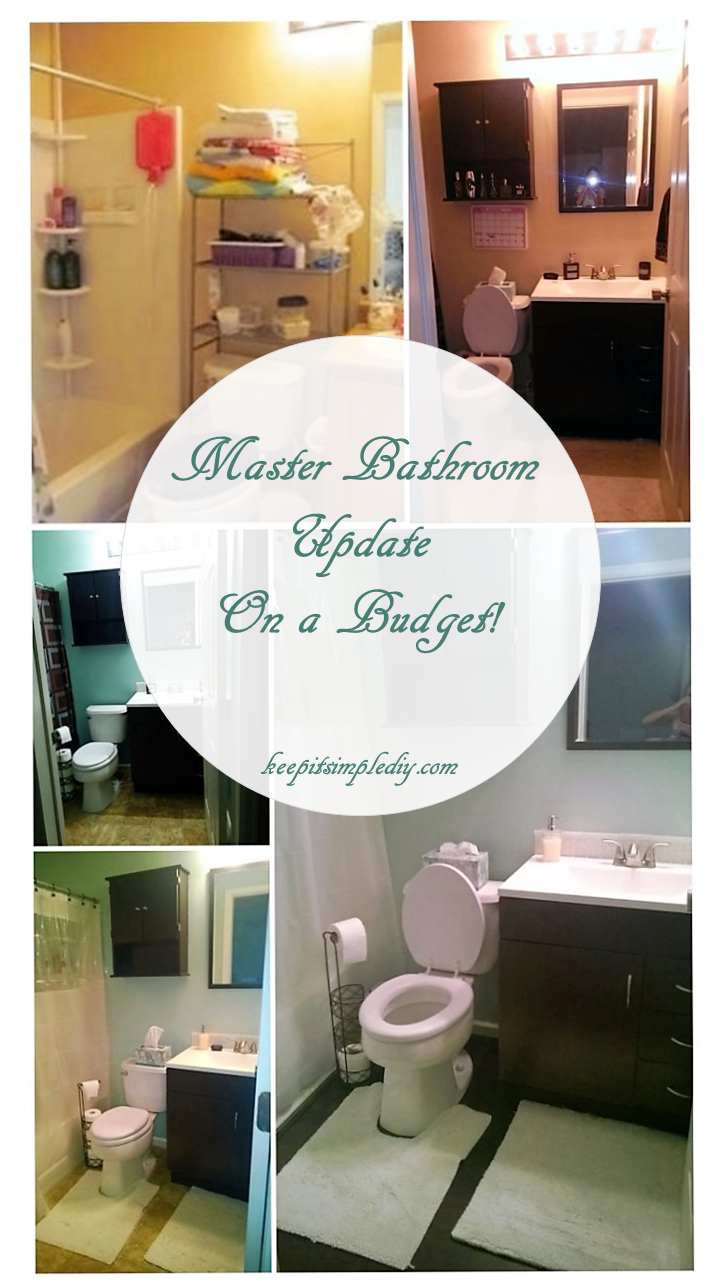
After living with the small bathroom, I knew I had to make a change. I didn’t have any storage except for a small square on the bottom of the cabinet for cleaning supplies (the first picture is from the previous owner’s listing of the house. I didn’t have a shelf for above the toilet), the sink was extremely high for my 5’2″ stance, and you couldn’t have the cabinet and the door opened at the same time.
So, I took to the books to figure out how I could make my bathroom more functional and on a budget! The standard cost of remodeling a small bathroom is 5% of a house’s value or approximately $10,000 for my house. Since I didn’t replace the toilet or shower/tub, one would expect to spend quite a bit less. Let’s say staying under $3500 would be considered a win. How much do you think this remodel costs? Leave a comment before reading further!

I completed my bathroom project a few steps at a time and ended up finishing under $500.

Here’s how I did it!
- To purchase most of the materials for Step 1, I opened a Home Depot credit card to get the discount. They offered 5% off originally but I knew better as I had seen other’s get more off for opening a card. I ended up getting 25% off.
- I got out my pink tools and DIY’d my way around having to pay a contractor (Tutorial to come with bathroom #2’s remodel).
- Paint: Now here’s the cool part. I had a ton of leftover paint from other projects, so I mixed some green, blue, white, and gray together and came up with Kari’s Crystal Castle! My home-made recycled color! I actually fell in love with this color and had Home Depot match it for me and make a few gallons for other areas of my house.
- I waited to redo the floors until I was redoing all of the floors in my house. I’m estimating that the bathroom used 1 box of wood an the underlay an protector. All when in comparison to the rest of the house, should be around $75. The floor is the only part I hired out. There is no way I was about to cut around all of those edges!
Spread the love


Great job on both the bath and saving money!
Cynthia @craftoflaughter
Love the cost break down! I think I could do that. I have a bathroom about that size that could easily be done. In my mind it was going to be thousands. Definitely saving this. And your bathroom looks fantastic:)
I love your custom color! I would be too scared to mix my own, but what you came up with is in my favorite color family. I'm impressed you did it all yourself- the after is a HUGE improvement!
Your before picture is so similar to how my bathroom is now. It's definitely in the plans to redo it so I really appreciated this post!
Great job! We're still in the midst of doing our own bathroom remodel. Replacing the vanity was definitely the most expensive part of the process. We're currently working on replacing the floor. We got everything but the edge pieces done. Totally procrastinating on that one!
So detailed and this is such good information! You did a great job at a reasonable price! Thanks!
This is such a helpful post. We have a master bath remodel in the plans…down the road a bit, but looming. 🙂 Please come share your blog posts over at the Home Matters Linky Party! We have a VERY SPECIAL PARTY planned this week, and we'd love to have you for a visit. The Door is OPEN. http://lifewithlorelai.com/2015/08/13/home-matters-linky-party-50/ 🙂
~Lorelai
Life With Lorelai