
This post contains affiliate links. As an Amazon Associate I earn from qualifying purchases. If you click a link and make a purchase, I may receive a small commission at no extra cost to you.
Recipes Used:
Products used in this video (Affiliate links)


Video Summary
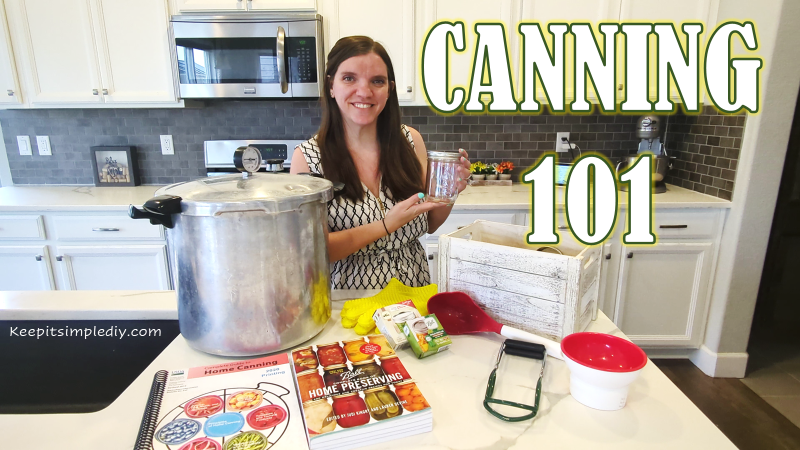
Hey everyone! Today I’m talking about how to can for beginners – specifically the basics of what you need to know to get started with pressure canning. I walk you through the essential equipment you’ll need, starting with the most important item: a pressure canner (not a pressure cooker!). I explain why I chose the Presto 23-quart canner and how it compares to All-American canners, including the benefit of being able to double-stack pint jars and use it on a glass top stove. I strongly emphasize the importance of following tested recipes from the USDA or Ball canning books to ensure food safety, and I explain why I prefer the USDA book with the spiral binding. I cover the different types of mason jars (wide mouth vs regular mouth, pints vs quarts), why you can’t reuse lids safely unless they’re specifically reusable like Tattler lids, and the essential tools you’ll need – with the jar lifter being the only absolute must-have tool. I also share some tips about other helpful tools like the de-bubbler, funnel, and silicone gloves that protect your hands from steam burns. I discuss the learning curve of getting your canner up to pressure (spoiler: you need higher heat than you think!), recommend doing a test run with just water first, and explain what botulism is and why following tested recipes prevents it. My goal is to make canning approachable and safe for anyone just getting started!
Video Transcript
Hey everyone, welcome back. My name is Kari and this is Keep It Simple DIY, and today I wanted to talk about how to can for beginners. So really I’m just talking about the basics. What do you need to know to get started?
The first thing that you need is to have a pressure canner. Now it’s really important that you make sure that you have a pressure canner, not a pressure cooker. Pressure cookers are not safe to can in. This is the Presto 23-quart canner, and the two main brands for canning, for canners, are Presto and All-American. All-Americans are on the more expensive side, and Presto is less expensive. And what I like about the Presto is you can also put it on a glass top stove. So the All-Americans, you definitely cannot do that.
So what I have here is the 23-quart. You could go with a smaller quart. I chose to get the 23-quart one though because I can double stack my pints. And so this has been super helpful. I just bought an extra rack for inside so I can have, you know, one stack here and then one stack up here. So before you decide to make your purchase, really think about how much you’re planning on canning. It might make more sense to spend a little bit more to get the bigger one rather than buy a smaller one and then have to buy another smaller one later because you’re canning so much.
Also with your canner, it’ll come with the weight. This is a 15-pound weight, and this is what comes with the Presto. Not all elevations require 15-pound weights, and so you can get a different type of weight that has rings that allows you to have 5, 10, or 15. I think there’s also weights for 11 pounds. So know your elevation, know what kind of weight you need.
Speaking of knowing your elevation, it’s really important to follow tested guidelines when you’re canning. There are a lot of canning recipes out on YouTube, and if they are not basing it off of a tested recipe, you need to make a judgment call. But the safe option is to not follow that recipe. Ball and the USDA have come out with safe recipes that they’ve tested to make sure that your family will be able to eat the food and not have any issues with it.
These two books are the main books that I would recommend for canning. I do have another Ball book on my phone. It was just a digital copy, but these are the two I gravitate towards. And honestly, I gravitate towards the USDA one a little bit more for two reasons. One of the main reasons is because it has just all the basic recipes, and that’s what I like to can. I can just basic meat or potato or corn. I like the ingredients, and this has it all in there.
The second reason is because of this spiral. When I got this, my husband got it for me for a gift, and I hated that it had a spiral because it doesn’t stack well inside of the cabinet. But what I’ve learned is you can just lay it out on your counter to the page that you need and it stays, whereas a book with a binding doesn’t. Now I don’t know if the Ball book comes with a binding, but if it does, I would choose the one with the ring binder instead. I will leave a link down below in this video to all of the products that I’m talking about, so don’t worry about writing anything down.
At this time, of course, if you’re going to be canning, you need to have mason jars. And so this here is a wide mouth pint. Which mason jar you choose depends on what you’re planning on doing with it or if you have a preference. I prefer to use wide mouth pints for anything that’s not a liquid. So if I’m canning beans, if I’m canning chicken, I like those type of things in a wide mouth jar because I can get my hand in to clean it out really well.
If I’m using a liquid, I prefer to use a regular mouth jar. Let me grab one of those to show you. If I’m canning a liquid, I prefer to use a regular mouth jar, and the reason for that is I can fit more of these jars in my canner at once than I can these. I can fit two additional jars. With these, I can fit eight on each row, which gives me 16. And with these, I can fit nine on each row, which gives me 18. But these are really hard for me to clean out because, see, my hand doesn’t fit in there. So if I have something like chicken and the chicken gets stuck to the bottom, I just can’t get it out.
I will also use these for things like spaghetti sauce. You can also use quarts, especially if you have a larger family. Quarts might be the best option for you because you can fit more food in them. They are double the size of pints. And then there are smaller jars. You have your half pints, which a lot of people use for jelly. I use them for onions. What else do I use them for? For sweet Thai chili sauce. And then there’s a bunch of the different sizes in between and below, but those are your main sizes that you’ll be working with.
Now with your canning jars, there’s a lid and a ring. This is your ring, and this is your lid. Lids cannot be reused safely unless you buy specifically reusable lids like Tattler lids. I’ve never tried those. I feel like that’s just an extra step that I don’t want to deal with. And so you use your lid, you throw it away. You can reuse it for things like putting something in the freezer, putting something in the pantry, but you can’t recan with it safely, at least per tested guidelines. So you’ll need to be buying your lids.
The two main name brands are Kerr and Ball to get your lids, and they of course come in wide mouth or regular mouth. There’s other different kinds of canning lids out there, but since there was a shortage a couple years ago, there have been a lot of canning lids that really just don’t work well for canning. They work more for decorative purposes. So it’s just important to make sure you’re getting a good quality lid. So if you’re looking on Amazon or something, make sure to read those reviews just to see what other people think about the lids specifically for canning. A lot of the reviews you’ll see that they said the lids buckled, and that’s because the lids are just too thin and they weren’t made specifically for canning.
Now let’s talk about the supplies that you need. You really don’t need a ton of supplies. Realistically, the only supply that I would say is an absolute must-have specific canning supply is this one. You use it to grab your jars and put them in and out of the canner. Of course, you could use some other type of glove to get them out. I just find this one to be my most used, my favorite canning accessory or canning tool.
Now this is a de-bubbler and a, well, I don’t know what you call that. It tells you how much headspace you have. So headspace is how much room you leave from the item in the jar to the top of the jar. Each recipe will tell you specifically, if you have a tool like this, it’ll have labels on each of these little notches and you just put it on the jar. But this is not a necessity. You can also look at the jar and know that the first ring is about a half of an inch and the second ring is about a whole inch. So if you need an inch of headspace, you just go up to this ring. There’s ways around not testing your headspace with an actual measure.
Now this other side of it, you use it to de-bubble. And what that means is you stick it inside of your jar and you kind of push it around to make sure there’s no bubbles in whatever food you have. If you have a liquid, that step’s not necessary. But you could use this with a lot of different things. I mean, right here, I mean I have a plastic straw. I could use that. I wouldn’t use metal, honestly, just because I don’t like the sound of it. There might be other research to it, but this would be my second go-to tool if I chose to have a tool, but this one isn’t as necessary as the other one.
My third go-to tool is to have some type of a funnel. I wish I had a bigger funnel. I bought this funnel thinking it would be wider, but it’s not. And I bought this because it does have the headspace on the side, which I’ve actually found I don’t use it at all for that. So realistically, get yourself a good funnel. It doesn’t have to be a canning funnel. It just needs to be a funnel, and you’ll be set.
This here is more of like a luxury canning item, which isn’t as much of a luxury when my funnel is so small. But I use this for when I’m making broth or any type of a liquid because it can pick up so much and it’s really nice and thick. So I actually really do like this spoon, but it’s hard when I have this small of a funnel to be able to get the liquid right into the funnel and not make a mess. But if you’re to get this, get a big enough funnel.
And then my last item that I think is a necessity for me, but you don’t necessarily need it, are these silicone gloves. And what I use these for is when you take your lid off, you’re first going to kind of tilt it over and it’ll let the steam escape. And then you’ll take your whole lid off and then all the steam is going to be coming up. Even though you’ve let the steam escape some, I have burned myself with that steam. And so to me, it’s totally worth it to have these silicone gloves so I don’t have to worry about that at all. And then I’ll also use these gloves to take out my rack from the middle when I need to get the jars out of the bottom half. So these have been super helpful for me.
Now let’s talk about when you get ready to do your first canner load. It’s recommended to start your canner with just water. I didn’t do that and I actually struggled a little bit, but try with water first. There’s a little bit of a learning curve when it comes to getting your canner up to pressure. Now if you’ve used a stovetop pressure cooker, you might not run into that curve. But the issue that I ran into was it was not coming up to pressure and I couldn’t figure out what the problem was. So what it ended up being was I didn’t have the temperature high enough. When you’re canning, you want to start with a high temperature, get it up to pressure, and then you’ll back the temperature off once you’re at the pressure that you need to be.
Now for specific instructions on how to run your canner, make sure you’re using your guide because there’s a whole process. You have to let it vent, which is just a fancy way of saying let it sit there for 10 minutes with steam coming out. It’s nothing too complicated, but you do need to make sure you’re following these steps precisely so that you end up with a safe product.
Again, I know I said earlier, make sure you’re following safe and tested recipes, but that’s super important because you don’t want there to be any type of foodborne bacteria, fungus, anything in there. And one of the main ones I’ve talked about with canning is botulism. Now botulism is pretty rare, but it can be devastating if it does happen. It’s not something to be afraid of as long as you’re following proper tested recipes.
And what botulism is is a paralytic that causes the organs in your body to shut down. One thing that botulism is used for currently is Botox. So if you think about Botox and you put it in your forehead, maybe get rid of all those wrinkles, it’s because it’s paralyzing that area. Botulism doesn’t happen all that often, especially, and the way to avoid it is just to use a safe and tested recipe.
All right, so that is everything that I have for my quick how to get started canning. I hope you enjoyed this video. If you found this video informative, please give it a thumbs up and subscribe, and I will see you in my next video. Bye-bye!


