
Products used in this video (Affiliate links)


Video Summary
Hey everyone! Today I’m canning up some chicken thighs, which I love to have on my shelf because it’s super convenient and I use it for anything I would normally use chicken for – even though it comes out shredded, I love it! There are two ways to can chicken: raw pack and hot pack, and I’m doing the raw pack method today which is the fastest and I find there isn’t much difference in quality between the two methods. I’m using my Complete Guide to Home Canning from the USDA and setting up 16 pints because I can fit eight pints on each row of my Presto 23-quart canner. Since I’m raw packing, my jars don’t need to be hot and they don’t need to be pre-sterilized because they’ll be sterilized in the canner – but they do need to be washed clean! I pack the chicken pretty tightly up to one inch of headspace, trimming off big chunks of fat and cutting pieces into manageable sizes to avoid air bubbles. After packing the jars, I let them sit for a bit and push the chicken down to remove air bubbles and make room for more. I really like packing them tight because the chicken shrinks down as it cooks. The raw pack method is great because I can get an assembly line going, unlike hot pack where you need to keep everything super hot. I add vinegar water to my canner (about two inches), wipe all the rims with a paper towel dipped in that vinegar water, add lids and rings finger-tight (not cranked down super tight, but more than just loosely – this took me a while to figure out!), and load both racks. I turn the stove to high and let it vent for 10 minutes once steam comes out, then put the weight on. Once it reaches 15 pounds of pressure, I start my 75-minute timer and adjust the heat to maintain that pressure. With the leftover chicken, I made two marinaded bags for the freezer using teriyaki with pineapple juice and lemon pepper. After the timer finished and pressure came down to zero, I carefully opened the canner using silicone gloves to avoid steam burns, and I immediately heard the happy pinging sounds of lids sealing! I ended up with 18 pints total, and they made quite a bit of nice broth on their own – that’s why I love raw pack, it makes its own broth instead of having to add water or other broth. They need to sit for 24 hours before I wash, label, and put them away. Always remember to use tested guidelines from trusted sources like USDA and Ball when canning!
Video Transcript
Hey everyone, welcome back. I’m Kari and this is Keep It Simple DIY, and today I’m going to be canning up some chicken thighs. I love to have canned chicken on my shelf because it’s just super convenient and I use it for anything that I would use chicken for. I used to like to have like diced chicken be in certain meals, but now even though it’s shredded, I love it.
There are two different ways to can chicken. One’s raw pack and one is hot pack. I’m going to be doing the raw pack method today, which means I’m just going to be sticking the chicken into the jars raw. That’s the fastest, and I find that there isn’t too much of a difference in quality from raw pack to hot pack.
I am going to be using my Complete Guide to Home Canning from the USDA today to can the chicken. And I love it because I can just open it up right to the page that I need. And I already got out 16 pints because I know I can fit eight pints on each row of my canner, and I will just get started.
I know I’m going to have some extra chicken, so I did cheat and get a few marinades. I like to make them myself usually, but I will use these for whatever chicken I have left.
So since I am not going to be hot packing these, my jars do not need to be hot. Also, I don’t need to sterilize the jars because they are going to be sterilized in the canner. But I did make sure that these are washed clean jars.
First thing first, I need to add some vinegar to my canner. I have the Presto 23-quart and I already have water up to about two inches or so in there. And I’m going to make sure to leave that off. We’ll get everything coming up to pressure at the same time.
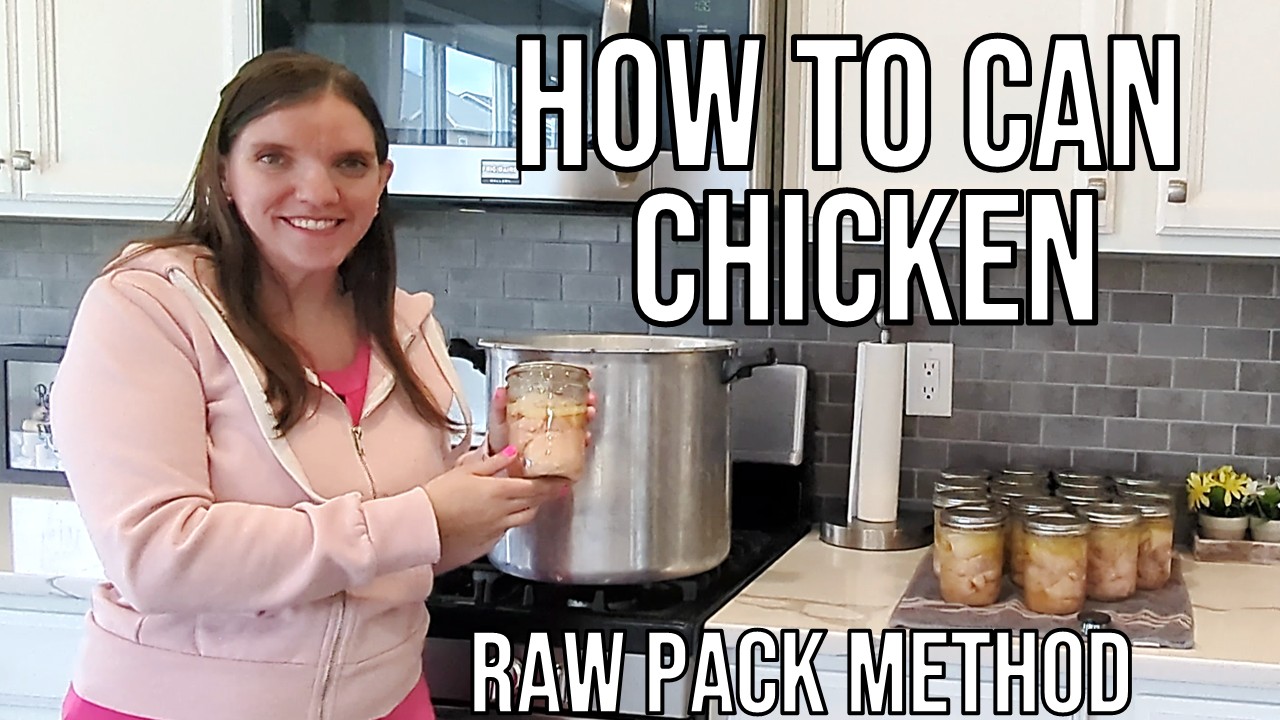
And I’m literally just going to pack these pretty tightly up until we get to one inch of headspace. And that’ll give me, let me show you. I’ve got one. This is an example of the final product. I canned this in August of 22. I can 16 so we’re just getting out. This is how they come out when I pack them all the way full to the one inch line. So they get quite a bit of broth just from the chicken itself.
All right, I’ve got myself a just a silicone cutting board that I can put in my dishwasher and a knife. I love these ceramic knives. I’m gonna get my trash can out. I do like to get, if there’s like big chunks of fat, I like to get that off before putting it in the jar. And then I also like to cut these into manageable sizes just because I don’t want a lot of like air bubbles in here.
All right, my jars are all full, but what I like to do is come through after the chicken’s been sitting for a little bit and just push it down and make sure to get any air bubbles out. That way I’ll have a little bit more room to go back and add any chicken if I need to.
All right, that’s about as much as I’m going to get into these jars. I do like to pack them really tight. That way the jars still end up full because the chicken shrinks down as it’s cooked.
I have a little bit extra chicken, and while my hand is still really chickeny, I’m going to just trim the fat off of it so that I’ll have it ready to put it in bags.
All right, I just dipped the paper towel into actually the pot of vinegar water. I’m going to wipe all these rims. You also want to make sure that you don’t have any chips on your rims. You can do that by putting your finger across. I checked mine before we started, so I know we’re good.
I really like using the raw pack method because I can just get an assembly line going. A lot of other canning methods, specifically the hot pack, you can’t get an assembly line going because you want to keep everything super hot.
All right, now we need to add our lids and our rings. I’ll put the rack in between and put two layers.
Oh my gosh. Very heavy. So I will get all these in the canner and then I’m going to put the lid on. We’ll turn the stove on then. It’s still not on because I wanted to make sure that everything kind of is the same temperature. And then we’ll let it vent. So we’ll want steam to come out of the canner for 10 minutes, and once that happens I’ll put my weight on. And then we’ll build our pressure and then we’ll cook it. I think it’s 75 minutes. Let me look. Yep, it is a 75-minute processing time at 15 pounds of pressure for pints at my elevation.
Types of chicken. And you want your rings to be finger tight. And that was hard for me to tell originally what it was supposed to be because I didn’t want to like crank it too tight. And what I realized is I wasn’t putting it tight enough. I was kind of just like doing a little bit of my fingers to get it. You want them kind of cranked down, but like don’t really crank them down, just like a little bit.
Here’s what we’re looking like, and now I’m going to put the lid on and turn on the stove. I’m going to turn it on to high because it’ll take it a minute to warm up. So now it’s just the waiting game.
Now I have these chickens and I’ve got these marinades. Let’s see what we want to use. I have teriyaki with pineapple juice, lemon pepper, and Caribbean style jerk. I don’t think I have enough of these to use all of them. It is May of 2023, so I’m just going to put, I guess half of this in each. I’ll just put half and half. This is a lot of sauce. That’s all right. We probably could have put this much on like four bags. Okay, put the air out. You gonna help get the air out?
I’m gonna stick these two in my freezer and we will have them for a quick easy meal. I’m gonna clean things up a little bit, and then we’re just waiting for some steam to come out of our vent.
Here’s the steam coming out. I’m hoping you can see it on the camera. I think you can see that there. It’ll come out a little stronger in just a minute, and we’re just about ready to start our 10-minute countdown. And then as soon as that 10 minutes is over, I will put the weight right on that little spout. In the meantime, we might also see this little part right here pop up saying that the whole canner is pressurized.
All right, we’re really venting. I’m going to put the weight on there. And now what we’re doing is we’re just going to wait until our pressure gets all the way up to 15. Once it gets to 15, I can go ahead and start the 75-minute timer. And as it gets to 15, it’s needing to still be on high pressure, but then I will lower the pressure a little by little after we get to 15. The goal is to keep it at 15 and not go any higher, but also not go any lower. And once it gets to 15, this little guy will start to jiggle and let some air out, and that’s how it will stay at pressure.
The canner’s come down to zero pressure and this front part has come down, so I’m going to take off the weight and now we’ll open it. This is my least favorite part because I have been burned by this steam before. So I’m going to use silicone gloves, and I’m actually just going to pop it on top like this for a little bit and just let the steam come out. I can already hear the popping of the lids inside of the jars, which is a good sign.
All right, so I am going to take this off, and I like to rotate it and just move it over here. I’m always afraid that I’m going to get either burned by the steam or then I’m going to drop the water from the lid, the condensation, onto my feet.
So let’s get these out of the canner. This tool is a must-have. Let me just pick them up, put them over. This is some good news. You hear all those pings? That is a canner’s happy place. These look so great. I’m very happy to have them back on my shelf. Well, they’ll be on the shelf tomorrow.
So what I’m going to do here is these have to sit for about 24 hours, and so I will leave them until tomorrow afternoon when I get home. And then I’ll go through, I’ll give them a good wash, and I’ll label them, and I’ll put them away. For now though, this is the last step aside from cleaning up.
Oh my shoulder. Two more. Here they are, all done. You see how that made quite a bit of nice broth? This is why I like doing it raw pack, because instead of having to like put water over them or different broth, it just makes its own. It works out so well.
So we have a total of 18 jars here, 18 pints that I will be able to add to my pantry shelf. I did want to remind you that if you are canning, make sure to use tested guidelines from a trusted source. USDA and Ball are great sources.
If you liked this video, please give it a thumbs up and subscribe, and I will see you next time. Bye!
Oh my God, scary! That’s like embarrassing. Seeing that and I had no idea you were there. Why were you sneaky? You could have like made noise as you were coming up.


