
Recipes Used:
- https://thefeatherednester.com/sourdough-sandwich-bread/?pp=1
Products used in this video (Affiliate links)


Video Summary
Hi everyone! Today I’m making a sourdough sandwich loaf, which is different from the typical artisan-style sourdough I usually make. I start by feeding my sourdough starter that’s been sitting in the fridge for about a month – I add 77 grams each of warm water and flour to match the starter amount I have, then let it double overnight. The next morning, I mix up the dough using my Danish dough whisk, which is perfect for sourdough. This recipe is a bit different from traditional sourdough because it includes olive oil and sugar along with the usual ingredients, and it only requires one set of stretch and folds instead of multiple sets. I use 100 grams of starter, 300 grams of warm water, 500 grams of flour, plus the oil, sugar, and salt. After letting the dough autolyze for 30-45 minutes, I do one round of stretch and folds, then let it rise for a few hours until it doubles. I shape it into a rectangle, place it in a loaf pan, and let it rise again before baking at 375 degrees for 45 minutes. The bread turns out beautiful and tastes fantastic, though I note it’s a bit sweeter than I’d prefer so I’d reduce the sugar next time. I also learned to remember to grease the pan – I forgot this time but eventually got the loaf out! This is one of the best breads I’ve made and I’m excited to finally have sandwich bread in the house again.
Video Transcript
Hi everyone, it’s Kari at Keep It Simple DIY, and today I’m going to be making sourdough. I have my sourdough starter here. It’s been in the fridge for actually about a month since I’ve used it last time. I am going to feed this starter today because tomorrow I plan to make a sandwich loaf. And so what I need to do is add some warm water and some flour, and that’s it.
So I did note on my jar that the amount of starter that I have in here is 77 grams, and because that’s not a lot of starter, I’m not going to do any discarding. I’m just going to feed the entire amount because I’ll use that much tomorrow. So what I want to do is I want to put my jar and my starter on my scale, and I just tared it so it’s showing zero grams, and I want to add water, warm water, until I get to 77 grams. Okay, we went a little over, 82, but that’s all right.
I’m going to stir this together until it’s fully combined and milky. Let me show you what this is looking like at this stage. Okay, now that it’s all the way combined, I’m actually going to tare it again. And I did leave the spoon in, but that’s okay, because I’ve tared it with the spoon in it. So 77 grams of flour is what I’m looking for. A little too much. Goal is to get the flour in the jar, of course. Okay, we’re at 81 grams. That’s also a little higher. A little bit here and there I don’t worry too much about.
I’m going to mix this together as well. I don’t need it to be on the scale though. Turn the scale off. Well, the scale didn’t turn off. That’s okay. Fully combine these. Okay, let me show you this consistency.
Okay, that was about all we needed to do. I’m going to scrape down the edges. I’m going to get anything off of the spatula. And the last step here is to raise my rubber band so I can see visually if it’s doubled or not. So I’m just putting this rubber band right at the level that the sourdough starter is at, and then I’m going to lightly put the lid on top, but I’m not going to twist it on because I want the air to be able to get in. So I’m just going to set it on top and then put it on my counter, and we’ll be back to see it in the morning.
Good morning. It is the next day. Our sourdough starter has doubled in size, which is perfect. That’s exactly what we want. And I am going to throw together the dough. So for this dough, I’m just going to use my Danish dough whisk. I love this thing for making sourdough. It is great. Any thicker of a dough would be kind of hard with this, but this has been my best friend for sourdough. Let me grab my recipe.
All right, I wrote down what I would need. I am deviating a little bit from the recipe. What else is new? I always deviate from every recipe. So I’m going to start with a hundred grams of starter. So I’m going to turn on my scale, put the bowl down, and then we’re going to tare it, and we’ll grab a hundred grams. Look at how nice that looks. And that’s too much. Whoa, I want to take a little out. We’re one gram away. All right, there we go.
All right, we also need 300 grams of warm water, so I’m looking now to get us back to 400. Now you want to make sure that your warm water isn’t hot. If your water is hot, you’re going to kill your starter. You don’t want the starter killed because that’s what’s going to make the bread rise. All right, there we go. And now we’re gonna mix this together.
Now this recipe is a little bit different than your standard sourdough recipe. I haven’t tried it before, so we’re going to see how it goes. On a typical sourdough recipe, at this point, you know, you would stir it in and get it all milky, which we’re still going to do, and then you would add your flour, you would let it autolyze, and then you would add your salt later. This actually has some olive oil in it and sugar in it, and we’re going to add the olive oil, sugar, and salt while we’re mixing it.
All right, so that’s all combined, and now we need to add 56 grams of sugar. I’m actually just going to tare because I’m going to leave the spoon in there. And 56 grams. Okay, 56 grams exactly. And we need nine grams of salt. Okay. And then 20 grams of olive oil. That’s perfect.
All right, I’m gonna mix these up again while we have just the wet ingredients. The last thing we’re going to need is 500 grams of flour. I’m not sure if I have enough flour in here, so I did get some more out. Okay, I’ve got everything mixed in. We’re going to tare it again. Let’s add 500 grams. Not even close. That’s 161, so let me refill this. All right, we’re going to 500. Where are we at? We’re at 161. Okay, that’s 512. I don’t want to be at 512. Okay.
Now we mix it up. And my sweetheart, hey baby, can you stay off the counter, please? And I don’t need it to be on the scale to mix it. This is where this whisk comes in perfectly. A regular whisk would be too flimsy to make something like this, but then a spoon doesn’t really mix it together as efficiently, so this is perfect.
And this dough is actually not a super hydrated dough. We’re looking at the 60 percent. It’s going to turn into a bread loaf rather than your standard, or a bread loaf like a sandwich loaf, rather than just a standard, you know, artisan style that you do for a sourdough. We haven’t had bread really in our house in a while. I mean, we’ve had hamburger buns and such, so we’ve eaten bread products, but to just have like bread to do with toast or a sandwich, we haven’t had. So I’m excited to try it with sourdough. I’ve only ever done regular sourdough loaves. I’ve made a lot of other sourdough things, but bread wise, ciabatta and sourdough loaves.
All right, we’re looking combined. So what I’m going to do is I’m just going to take my lid, put it on the top, and just set it back here for about a half hour to an hour, and that is called autolyze. We’re just letting everything combine together. Then we’ll come back and we’ll do some stretch and folds.
I want to get my sourdough back in the fridge because I don’t plan on using it again today. I don’t have anything I need to discard, but what I want to do is get it into a clean jar because this jar kind of got a little messy. So I’m going to put a new jar down and tare this scale, and I’m just going to transfer this sourdough into this jar and see how much I have.
I like to put how much I have when I put it in the fridge. That way I know how much to add when I’m doing my feedings, and I like to do one-to-one-to-one ratios when I do feedings. And so I do one part sourdough starter, one part flour, and one part water.
All right, I also like to write how many grams are of sourdough starter in my jar. It says 77, which is not the same, so I’m just going to wipe it off. I just use a wet erase marker. I need to add a little more. Variety of calories. Okay, so what did we say that was again? 107 grams. All righty.
Going to put on my rubber band. The rubber band at this point isn’t really necessary because I’m not planning for it to double in size, but at least it’ll be here for when I need it next time. Lid just nicely on like this, and this goes in the fridge.
All right, our dough has sat for about 30 to 45 minutes, and what I’m going to do is stretch and fold. I am going to get my hand wet first because that’ll make this a whole lot easier. So to stretch and fold your dough, you’re just going to take a side of your dough, pull it up, and fold it over. And we’re just going to do that all the way around. Pull it up and fold it over.
And this recipe is interesting. It only said to do one set of stretch and folds. On a typical sourdough recipe, you do stretch and folds every half hour for an hour and a half, two hours, and then you let it sit for a period of time. This one only had to do it once, so I’m only going to do it once and we’ll see how it turns out.
I am going to let this sit for a few hours. This recipe did say 8 to 12, but I increased the amount of starter so that way it would be a quicker rise dough. And so what I’m going to do with this is just set it back on the counter, let it sit until later this afternoon, early evening, and then we will be back to shape the dough. All right, lid goes back on, and this goes back on the counter.
All right, it’s been a few hours and our dough has risen beautifully. I’m going to transfer the dough onto my mat and then shape it into a loaf, and we will put it in this loaf pan and let it rise for another few hours, just until it’s doubled in size. See, I think I’m gonna need a little bit of flour. When you’re working with any dough, you want to put the least amount of flour down possible, but you also don’t want it to stick too bad. So I am just going to go with that.
Okay, so what we want to do here is we want to stretch it out, so push it down and stretch it out into a rectangle. And then we want to aerate a little. I don’t know if that’s called aerating. I just took a guess, but they said you’re supposed to do this, so I’m doing it. So I’m going to take this and stick it into our loaf pan. This needs to rest for a few more hours, and then we’ll be ready to bake.
All right, the dough has risen. I just took it out of the microwave. It was just setting in there, and I am going to stick it into our oven for 45 minutes at 375 degrees.
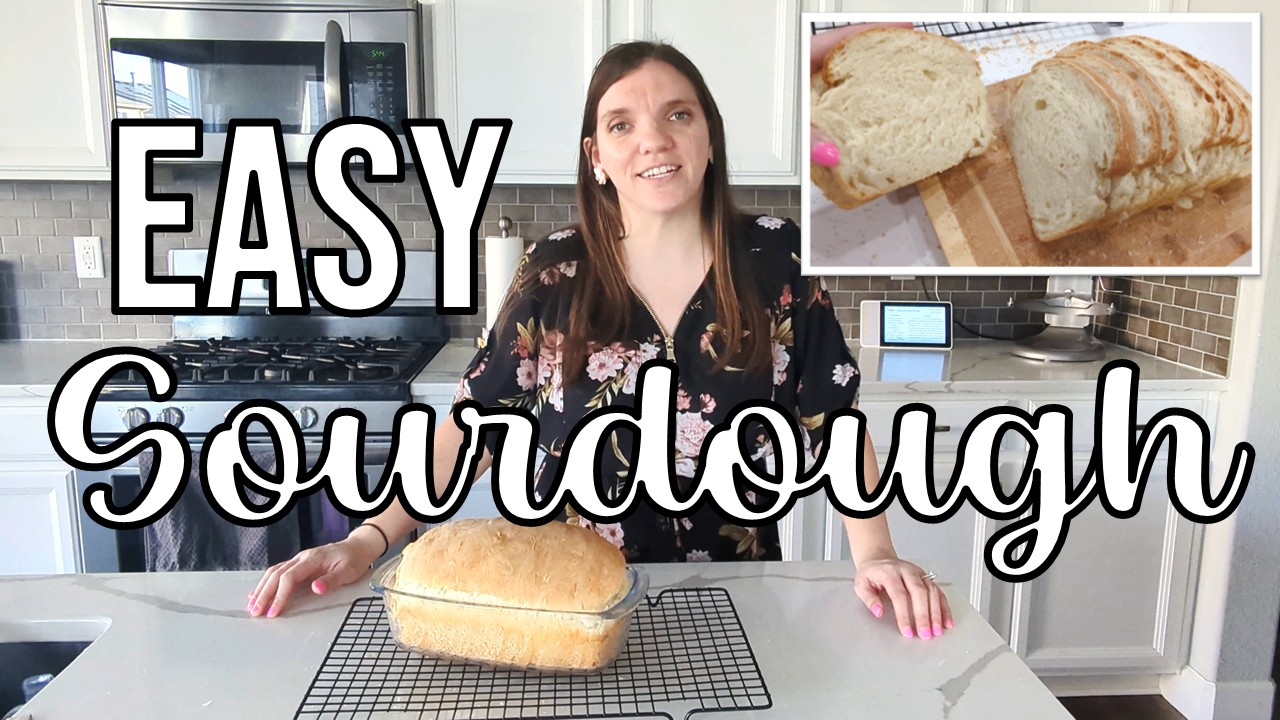
All right, the timer just went off on this, and look at that. That’s beautiful. Let me get it out and I’ll show you. All right, here it is. I am going to let this cool for about 10 minutes and then stick it on a cooling rack, and then we will slice it up.
All right, our dough has been sitting for a while. I can now pick it up. I did make one mistake. That mistake is I did not grease the pan, and so it will not come out. So I’m just going to cut into it kind of like we would for a quick bread. So it’s gonna stay like this, but I did already cut a little piece out and took a little bite, and it’s fantastic. Probably one of the best breads I’ve made. Probably don’t need quite as much sugar as the recipe called for though. It is a little on the sweet side, or a lot on the sweet side. So I’m going to just leave it like this, let it cool completely, and I’ll just cover it with saran wrap, and we will just take slices as we want them.
I ended up being able to get this out. I am going to slice it up and show you what it looks like. I of course ate a bunch of it already. All right, here it is. Beautiful slices.
I am so happy you were here with me today in my kitchen. I hope you enjoyed it. I definitely did. I’m excited to see you next time. If you like this video, please give it a thumbs up and subscribe, and I will see you next time. Bye!


